Kjeragbolten vs Preikestolen: How Different Are They Really?
Is Kjeragbolten just a harder version of Preikestolen?
No. Kjeragbolten is a longer, more technical hike with three chain-secured sections and real exposure, roughly 10-12 km round trip over 6-8 hours, compared to Preikestolen's well-trodden 8 km, 4-5 hour trail. It also sits on a different road system that closes for winter, so the two hikes are not interchangeable and should not be attempted back to back without rest and preparation.
If you have just come down from Preikestolen and are wondering whether Kjeragbolten is simply the same walk with a longer clock, the honest answer is no. They share a region — both look out over the Lysefjord — and both end with a photograph most visitors have seen before they ever arrive. Past that, they are two different kinds of day out, and treating Kjeragbolten as “Preikestolen but longer” is the single most common mistake people make when planning a Rogaland hiking trip.
This page does not repeat the practical detail of the Preikestolen trail itself — trailhead directions, shuttle timing, parking cost — which is covered in its own guides. What matters here is the comparison: what actually changes when you swap one hike for the other, and why that change is bigger than most people expect.
Two hikes that only look similar on a map
On paper, both routes end at a dramatic rock formation above the same fjord, both are reached from the Stavanger side of Rogaland, and both appear on every “must-do” list for the region. That similarity is where the confusion starts.
Preikestolen is a flat plateau at 604 m, reached by a well-marked, heavily used trail of about 8 km round trip and 4-5 hours, with roughly 350 m of elevation gain. It is real, uneven terrain — not a paved path — but it is a single graded route that around 300,000 people walk every year, most of them without technical hiking experience.
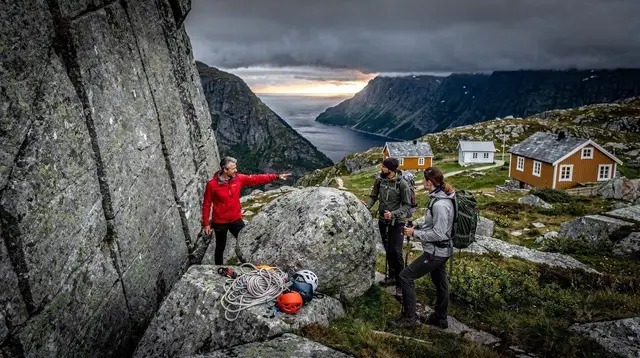
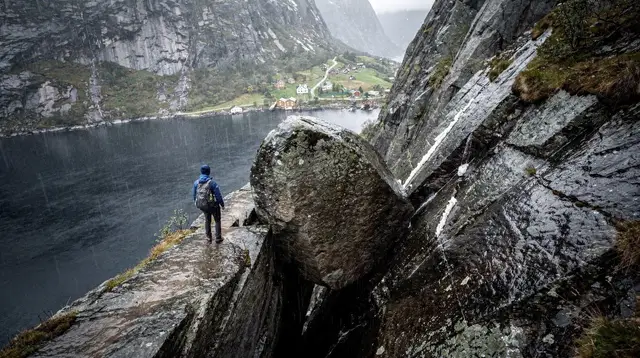
Kjeragbolten, on Kjerag, is a boulder wedged into a crevasse at around 984 m. Getting to it means covering roughly 10-12 km round trip over 6-8 hours, and crossing three sections of steep rock secured only by fixed chains. There is no equivalent to those chain sections anywhere on the Preikestolen trail. This is the core difference, and it is not a matter of degree — it is a different category of hike.
Distance and time: closer than you’d think, but not the whole story
| Preikestolen | Kjeragbolten | |
|---|---|---|
| Round-trip distance | ~8 km | ~10-12 km |
| Typical time | 4-5 hours | 6-8 hours |
| Elevation gain | ~350 m | Considerably more, over rougher ground |
| Trail character | Single graded path | Chained rock sections + exposed terrain |
| Technical sections | None | Three, secured by chains |
| Road access | Open year-round | Closes in winter |
The distance gap looks modest — a few extra kilometres. What the table cannot show is that those extra kilometres run over ground that requires using your hands, trusting a chain bolted into rock, and judging your own footing on wet stone with a drop beside you. Preikestolen’s extra difficulty is stamina and crowd management. Kjeragbolten’s extra difficulty is terrain itself.
The three chain sections: what actually changes underfoot
Kjeragbolten’s route from Øygardstølen crosses three steep rock faces where the trail relies on fixed chains rather than switchbacks or steps. Hikers climb and descend using the chain for support, often with both hands occupied, on rock that is frequently damp from fjord weather. There is nothing comparable on the Preikestolen trail, which — however busy and however uneven — never requires you to hold onto anything to move forward.
This is also where the danger difference becomes concrete rather than theoretical. Fatal falls have occurred at Kjerag, and the terrain is the reason: a slip on a chained section, or a misjudged step near the boulder itself, has far less margin for error than a stumble on Preikestolen’s trail. Guides in the area are explicit that Kjeragbolten is a serious hike for people with genuine hiking experience and comfort with heights, not a scenic walk with a good photo at the end. If that description does not match how you’d describe yourself after Preikestolen, treat it as a real warning rather than caution for its own sake.
Access: a different road, a different season entirely
The two hikes do not even start from comparable places. Preikestolen’s trailhead sits on a road that stays open through the year, even though snow and ice make the trail itself considerably harder outside roughly May to September.
Kjeragbolten is reached via Lysebotn, at the end of a narrow mountain road down to the fjord floor, from the parking area at Øygardstølen. That road closes for winter, which means Kjeragbolten access disappears for a large part of the year regardless of how the weather looks in Stavanger itself. Anyone planning a trip outside summer should check the Lysebotn road’s status well before assuming both hikes are on the table — see the current opening and closing pattern in the guide to Lysebotn road dates and what typically shuts down in winter across Preikestolen and Kjerag.
Why “I did Preikestolen, so I’m ready” is the wrong logic
It is an easy trap. Preikestolen is genuinely tiring, the crowds make it feel like an achievement, and finishing it can create a false sense of having proven your hiking fitness for the region. But Preikestolen tests stamina and patience with crowds; Kjeragbolten tests terrain judgment, upper-body use on chains, and composure with exposure on three separate climbs. Neither hike substitutes for training in the other.
If you are weighing up whether to attempt Kjeragbolten shortly after Preikestolen, treat them as separate commitments that each deserve a rested day, not a single trip split across two consecutive mornings. Fatigue is when the chain sections stop feeling manageable, and Kjeragbolten is the wrong place to find that out.
For anyone still deciding whether to attempt Kjeragbolten unguided, it is worth reading through what going with or without a guide actually involves, and being honest about whether standing on the boulder itself is something you actually want to do once you’re there — plenty of hikers reach Kjerag and choose to view the boulder rather than stand on it, and that is a completely reasonable outcome.
If you want expert support on either hike
A guided option removes a lot of the judgment calls that make Kjeragbolten harder than Preikestolen in the first place — route-finding, pacing on the chain sections, and a second opinion on conditions. The guided hike to Kjeragbolten from Stavanger covers transport to Øygardstølen and a guide on the chained sections, which suits anyone attempting Kjerag for the first time.
For Preikestolen itself, a local guided hike around Preikestolen is a lower-commitment way to see the plateau with route knowledge included, useful if you’d rather not navigate trailhead logistics alone. And if the chained terrain at Kjerag isn’t for you but you still want to see the scale of the Lysefjord that both hikes look down on, the boat trip to Preikestolen from Forsand shows the same fjord walls from the water, with no chains involved at all.
Planning both properly
Doing both hikes on one trip is entirely realistic — plenty of visitors do — but it works best spread across a longer stay rather than crammed into consecutive days. A five-day itinerary covering Kjerag and Jæren builds in the road-trip time Kjeragbolten needs, while a solo hikes itinerary for Stavanger is worth reading if you’re tackling either trail without a group. Whichever order you choose, check current trail conditions and the Lysebotn road status close to your travel dates rather than relying on what worked for someone else’s trip.
It’s also worth reading first-hand accounts of what going beyond just standing near the boulder actually feels like, and why locals will tell you Kjerag is closed more than it’s open across a typical year — both are useful reality checks before you build a schedule around a Kjeragbolten day that assumes it will simply be available whenever you show up.
Kjeragbolten vs Preikestolen: common questions
Can I do Kjeragbolten the day after Preikestolen?
Physically some people do, but it is not recommended. Kjeragbolten demands fresh legs for its steep chain sections and a longer day on your feet, and fatigue from the day before is exactly when ankle injuries and slips happen on exposed terrain.
Is Kjeragbolten more dangerous than Preikestolen?
Yes, meaningfully so. Kjeragbolten involves three sections secured only by chains on steep rock, real fall exposure beyond those sections, and documented fatal falls. Preikestolen’s plateau has no railing either, but the approach trail itself is far less technical.
Do I need a guide for Kjeragbolten if I already hiked Preikestolen unguided?
Completing Preikestolen unguided does not qualify someone for Kjeragbolten’s chained sections. A guide is not legally required, but anyone without scrambling experience or comfort on exposed rock should seriously consider one.
Why is Kjeragbolten sometimes closed when Preikestolen is open?
Kjeragbolten is reached via the Lysebotn road, which closes for winter snow long before Stavanger’s own weather turns difficult. Preikestolen’s trailhead stays reachable by road year-round, even though the trail itself gets harder in ice and snow.
Should I skip Preikestolen and just do Kjeragbolten?
Not as a substitute. They show different things: Preikestolen gives the classic plateau view straight down the Lysefjord, while Kjeragbolten is about the boulder itself and a wilder, higher stretch of the same fjord system. Many visitors do both, on separate days.
How much harder is Kjeragbolten in hours and distance?
Kjeragbolten runs roughly 10-12 km round trip over 6-8 hours with about three chain-secured climbs, against Preikestolen’s roughly 8 km and 4-5 hours on a single graded trail. The extra distance is the smaller part of the difference; the terrain and exposure are the larger part.
tours.kjeragbolten-hikes
Verified deep-linked GetYourGuide tours. Book through these links and we earn a small commission at no cost to you.
GetYourGuide does not provide a product photo for this activity — the image shows the meeting point, photographed by us.